
A hospital cart, a treatment cabinet, a nursing station. Before a buyer signs, the choices pile up fast. Three heights, four drawer sizes, two locking systems, casters in five or six inch, colors that follow the department, plus waste bins, IV poles and monitor arms. Hundreds of combinations in total. Passing a printed catalog back and forth while the quotation gets revised again and again, a deal can easily drag on for weeks. A 3D configurator exists to cut that loop short. This guide walks through the build in its real order: option tree, model, rules, quote summary.
Sort out the option tree first
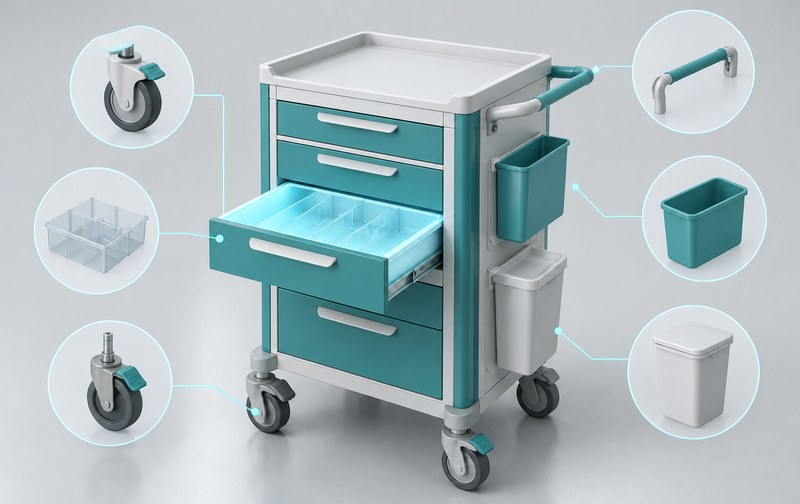
Sit down and break the product apart before any modeling starts. Which attributes stand alone, which ones follow another choice, which ones the buyer should never touch. Draw it as a tree. Drawers are the classic layered option, since they come in sizes and can be dragged into the cabinet and rearranged, so flattening them into one dropdown kills the whole point. Every option then lands at SKU level, with part number, name and quantity mapped out. The whole medical devices quote summary later depends on this base table. A messy tree at the start means rework sooner or later.
How much modeling is enough
The model does not need to copy the CAD file part by part. Hidden internal cavities can go. What deserves the polygon budget is the shell buyers will rotate and the drawer rails they will pull open. Textures only need to read correctly at material level. Hospital buyers judge the layout, not the beauty of the render. For a fuller view of the production pipeline, the article on 3D product display workflow four levels of 3D product interaction is a good companion read.
Constraint rules come next
The equipment moves. Drawers slide out, carts turn, casters have a turning radius. So constraints follow. Drawer travel range, clearance between accessories, a lock type that only fits one cabinet family. Write these as validation conditions and block illegal combinations the moment they are picked. The earlier the block, the fewer order revisions for the sales team. The rule library grows with the product line, a few entries per new model, and the long term maintenance stays light.
Quote summary down to part numbers
Keep a summary panel fixed next to the options. Every pick updates the list and the price. Medical buyers need records, so the final configuration sheet should carry the SKU and quantity of every part. The client takes it through internal approval, the sales team feeds it straight into the system. For how price linking can reach that granularity, the machinery walkthrough in our case section shows the same pattern at work.
Leave the backend to your own team
Models change year by year, so the option backend should stay in house. A new caster type or a new color goes live with a few clicks, no developer ticket needed. One configurator can also serve dealer training, same model, two entrances, cost shared across both uses.
Industries differ in what a configurator must emphasize. Machinery cares about drive structures, solar about parameter and price linking, medical about constraints and the final sheet. To see what a finished build covers, visit the 3D configurator service page and compare the tiers.
Related Q&A
Does a configurator for medical devices need part level detail
No. Buyers decide at component and layout level, part level detail stays inside your CAD files. Follow the purchasing habit, if procurement thinks in department configurations, break it down by component.
How long does one configurator project take
With fewer than thirty options and simple rules, roughly two months to launch. Layered interactions like draggable drawers extend the schedule, so fix the option list early instead of adding while building.
Can sales and customers share one configurator
Yes. Hide internal cost fields in the customer version, add SKU and discount fields in the sales version. One model, two entrances, single maintenance.