
The model file is delivered and the project is half done. The other half is the interactive part, the rotating, the clicking, the pulling apart. That is what visitors stay for. This walkthrough breaks 3D product interaction into six steps and states what to check after each one. No model yet? Start from the planning angle on the 3D configurator service page and come back to this list once files exist.
Step 1: Clean up the model first
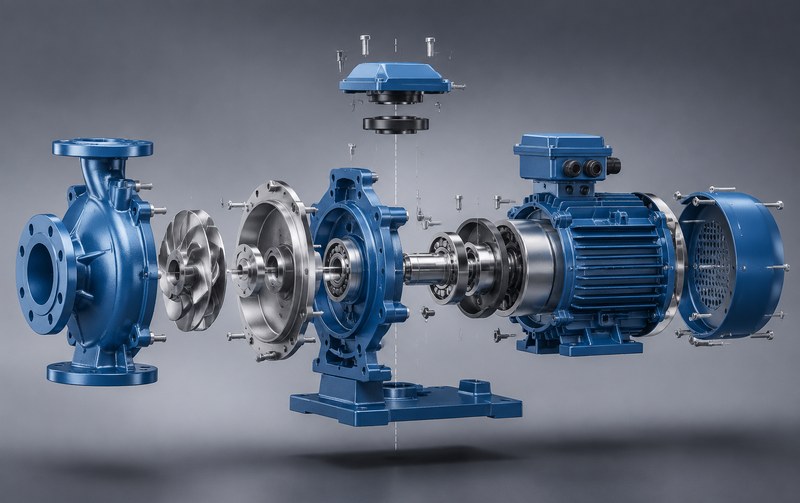
Do not rush into interactions. Open the file and check three things: whether parts are grouped and named by function, whether origin points sit in sensible places, and whether units are millimeters. A product with messy part names will force rework at almost every hotspot and animation later.
The acceptance bar is simple. Every screw, every panel, findable by name. Anything missing goes back to the modeling side. No exceptions.
Step 2: Cap the interaction list at eight items
Clients often ask for everything at once. Rotate, zoom, explode, cross section, material switching, hotspot notes. Cram all of it in and visitors stop clicking altogether.
Our approach is to reverse from visitor scenarios. Purchasing managers care about structure and process, so they get the exploded view with hotspots. End users care about looks, so they get material options. Keep the top four needs across both groups. Cut the rest. Live examples on the case page all stay within this scale.
Step 3: Hotspots, with copy tied to parts
Hotspots deliver the best value per unit of effort. Two rules apply. A hotspot must snap onto the surface of a part, never float in space. Its note must fit in two lines; cut the text, do not shrink the font.
One detail gets missed often. When the model rotates away, the hotspot hides behind geometry. Fade it to semi transparent or fold it to the screen edge. Never let it vanish, because visitors read a missing hotspot as a loading failure.
Step 4: Explode and assembly animation
For multi part products this step is worth it. What a static image cannot explain, a ten second exploded view can.
Technically, prefer translation plus rotation. Avoid skeletal animation where possible. Give the animation a draggable timeline. If a visitor parks it at forty percent to study the inside, let them park it there.
Step 5: Material switching
Products sold in both standard and custom variants save a pile of duplicate modeling money here. Put common combinations first, tuck rare colors into a dropdown. Metals and glass need individually tuned parameters. A generic preset looks fake on these surfaces.
Step 6: Acceptance before launch
Interactions built is not the same as interactions done. Run this list before going live. Does it rotate smoothly on a phone. How many seconds under a weak connection. Does every hotspot respond. Does lighting drift after a material change. Any single failure means the job is not finished.
Heavy models and slow loading belong to the production stage. The fixes are covered in this piece on web 3D lightweighting.
Related Q&A
Does adding 3D interaction require remodeling
Not necessarily. Industrial grade files with clean part grouping and topology usually go straight into interaction work. Only files with excessive polygon counts or welded structures need to be rebuilt, and a pre project model check will tell you which case you are in.
How long does one interactive display take
A single product with clean structure, covering hotspots, explosion and materials, finishes within a week. Projects that need model rework add three to five days. Quotes follow the written list, never verbal promises.
Build on the official site or embed a third party platform
Self hosting loads faster, keeps data in house, and connects directly to inquiry forms. Third party embeds are easier but push visitors onto someone else domain, which weakens the brand feel. Budget permitting, self host.